Smart Pet Feeder
Upgrading a connected pet feeder by integrating an ESP8266, enabling complete local control within Home Assistant.
| Skill | Cost | Time |
|---|---|---|
| 4 / 5 | ~45 Euro | ~60 min |
In the age of smart homes, automation has seeped into every corner of our lives, even our beloved pets' feeding routines. Automated pet feeders are convenient but often have limitations, especially when integrating them fully into your smart home ecosystem. In this DIY guide, we'll explore how to hack an automated pet feeder by replacing the Tuya WBR3 with an ESP-12F module with custom Arduino code. This will enable seamless integration with Home Assistant, allowing you to control your pet's feeding schedule from your fingertips without relying on a cloud service.
Brands
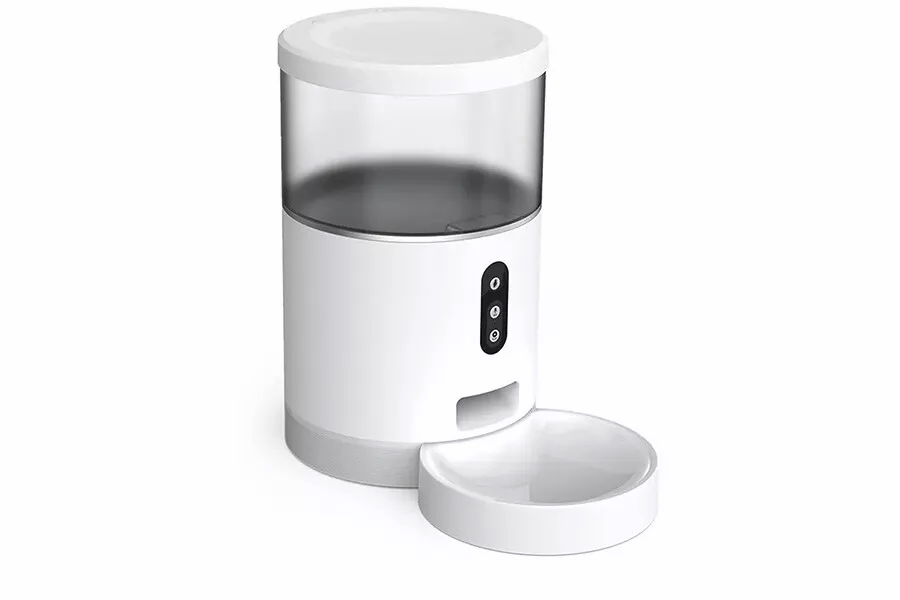
Our altered device is sold under many brands: Geeni, HBN, Living Enrichment, Peteme, Tech4Pets, BYAN, Aitek, Pet Genius, Instachew, VBESTLIFE, and Sign. It is available in two variations: one equipped with a camera and another without. We opted for the version without a camera due to privacy concerns and the lower price tag. The best part? No matter which brand you choose, this device is precisely the same, so since we're voiding warranties, it's wise to opt for the most budget-friendly option available. We got the automatic pet feeder for just over €40. Usually, these gadgets range from 35 to 251 euros.
Bill of materials
Solution - Hardware
We began by disassembling the pet feeder and employing a multimeter to reverse-engineer the microcontroller. This allowed us to replicate its functions using the ESP-12F.
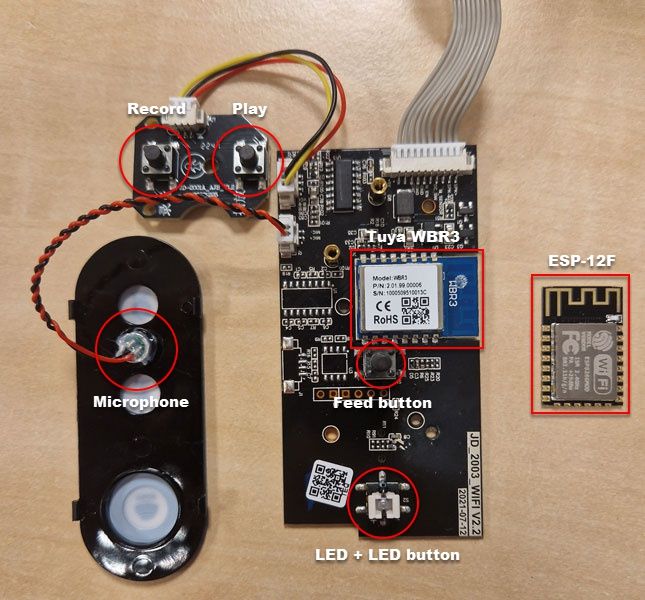
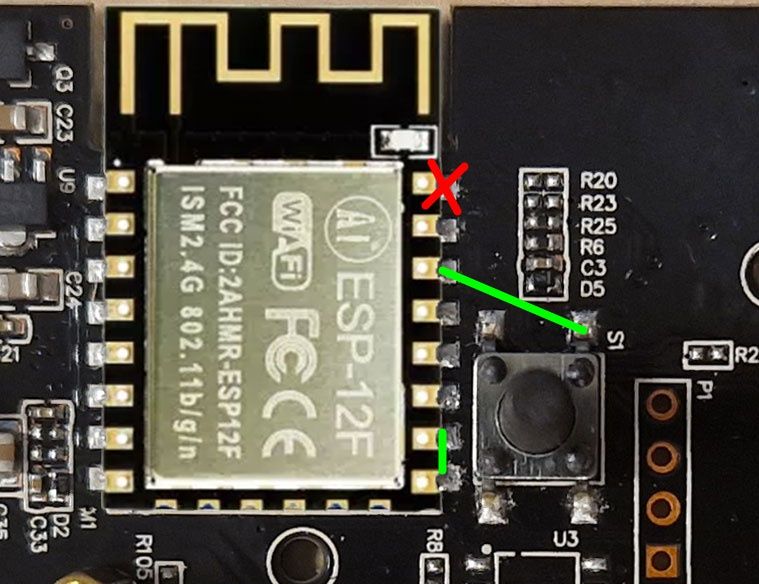
Next, we utilized a hot air rework station to carefully remove the WBR3 from the PCB, cleaned the solder pads, and replaced it with the ESP-12F, ensuring a secure soldering connection. Don't connect TXD0 to avoid boot problems. Further details are explained in the following paragraph.
Complications
Regrettably, the use of TXD0 and GPIO15 pins will create problems with this board. The LED is connected to GPIO15 which needs to be LOW, and the feed button pulls TXD0 LOW, preventing the ESP8266 from booting up.
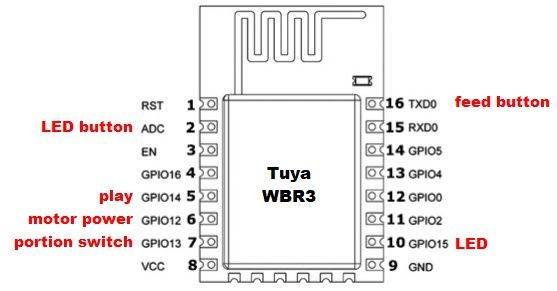
To resolve the GPIO15 issue, soldering a bridge between GPIO15 and GND is a straightforward solution. Keep in mind that this will keep the LED lit, which isn't a major problem. However, if this bothers you, you can always disconnect the LED.
Removing the TXD0 pin through desoldering and creating a bridge between the feed button and GPIO5 allows us to continue using the button for meal dispensing.
Solution - Software
We've developed custom Arduino code and integrated WiFiManager for effortless setup. Once you power on the device, connect to the SHGio_Pet_Feeder WiFi network and open your browser to http://192.168.4.1. You can link the pet feeder to your WiFi network and input your MQTT details. After the device restarts, it will automatically employ auto-discovery in Home Assistant, seamlessly adding the feeder to your smart home setup.
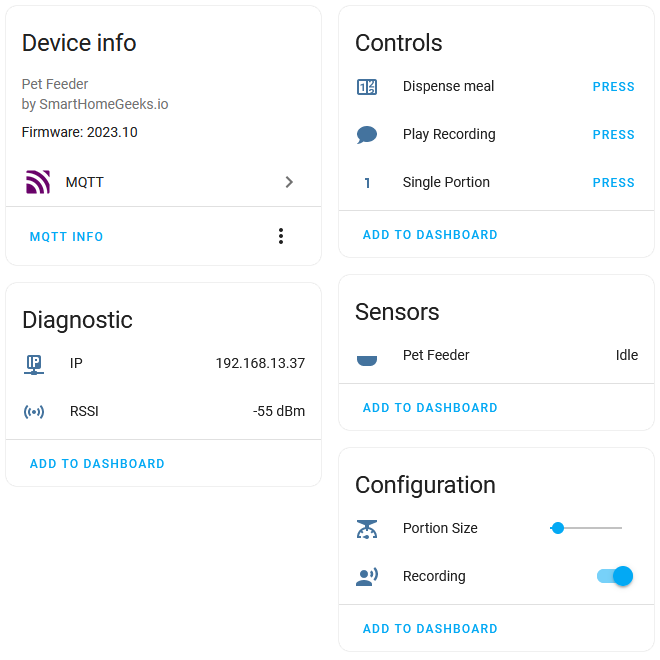
You have the flexibility to adjust the portion size of each meal. The LED button dispenses a full meal, whereas the feed button releases a single portion. To provide multiple portions, simply press the feed button multiple times.
If you need to reset the device completely, press the feed and LED buttons simultaneously for 5 seconds. This action will remove all settings, including Wi-Fi and MQTT details.
Conclusion
We've achieved full local Home Assistant integration by swapping out the original Tuya WBR3 module with an ESP-12F and flashing it with our custom Arduino code. Enjoy the convenience of feeding your pet on your terms while being a tech-savvy, privacy-conscious pet parent!